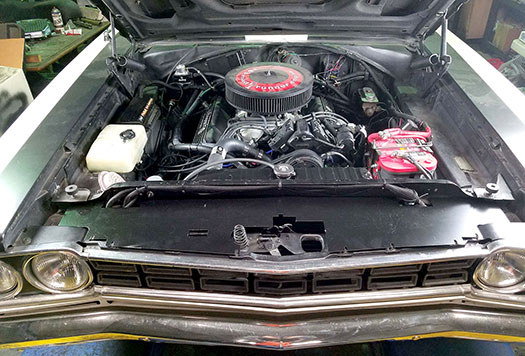

Project 22” b‐body upgrade started with an inquiry about an “original owner, numbers matching” ’68 Road Runner owned by a fellow named Charlie in Sacramento, Calif.. Charlie stated he bought the car in ’68 when he returned from Viet Nam and will have this car until he dies. Over the years the car has gone through a lot of transformations with upgrades to the original 340 horse 383, suspension, and chassis components and has always “run warm since day one”, in his words. About 10 years ago the engine was bored 30 over and a .545 cam installed to go rally racing and an original air conditioning unit from a donor car was installed. Over the years he’s tried several versions of a 22” radiator to keep this monster cool to no avail and asked if we could help. The correct way to approach a project like this would be to change the core support to a 26” which is how this car would have come from the factory with “factory air”, and install a 26” wide radiator to complete the upgrade. In uni‐body cars that’s a fairly labor intensive and expensive path for most vintage Mopar owners to go unless doing a comprehensive restoration. Charlie stated, “I don’t care what you do or how long it takes as long as I can drive the car without overheating” so we set out to do just that in hopes of creating several bolt in product’s to deal with 60’s cooling system engineering issues we were aware of.
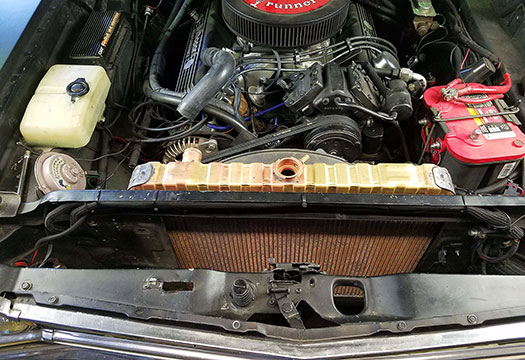
The first step was to test all aspects of the cooling system to see where improvements could be made including the actual design of the radiator and mounting efficiencies/deficiencies as it relates to “air‐flow”. Throughout the 60’s Chrysler radiators were produced with a “bucket header” design on all 22” wide units and a “flat header” design on 26” wide units used on big blocks with air and Hemis. During the same time period Ford used the same top tank bucket header design on most of their small to medium horse power and wheel base cars as well. However, by 1970 Chrysler discontinued the use of bucket headers and changed the 22” radiator top tank to mount to a stronger flat header design thus preventing top tank seam failure from the higher pressure created by coolant expansion at higher temperatures. Ford made the change in ’67 on big block cars and by 1970 the bucket header design was no more.
Knowing the better style radiator for high horse power and performance began in the 70’s we began by building a 70’s style radiator, both in 22” and 26”, to mount in a 66‐69 B‐body 22” core support for big block’s and high horse power cars. By doing so we were able to move the radiator and core closer to the core support which not only created some additional room between the radiator and engine but more importantly created greater airflow through the radiator by reducing the gap between the condenser and radiator core. Other problems we found with air flow on this car was the mounting of the pusher and puller electric fans and re‐circulating engine compartment heat rather than pulling ambient air through the grille.
Once we designed the Chrysler styled radiators (22” and 26”) to fit the original 22” core support and center on the manual fan, along with an electric fan kit and available shrouds for both if desired, we focused on maximizing air‐flow at all performance ranges and came up with an upper grille to support air dam that increased through the grille ambient air by 18%. The overall tests were VERY GOOD and the pictures pretty much tell the story step by step.
Project Car:
1968 Road Runner
383 cu in. bored 20 over
.545 Comp Cam
Crane Fireball Hi-6 ignition
Holley Terminator EFI
Estimated 400-500 HP
Non air car with 22″ core support
Aftermarket 22″ 3 row radiator core
Flow Kooler water pump
180 Mr Gasket thermostat
Initial Air Flow and Coolant Temp Tests:
1.0-1.3 MPH @ 1000 RPM idle air flow with unshrouded 16″ electric puller and pusher
200 degrees at radiator inlet holding
50 MPH @ 3000 RPM (2nd gear)
225+ degrees and climbing
Final Air Flow and Coolant Temp Tests 22″ and 26″ Radiators @ All RPM Range (160 stat):
5.0 MPH idle air w/ shrouded dual 11″ electric pullers
6.0 MPH idle air w/ 17″ 7 blade shrouded manual fan
18% air gain on both with a grille to core support air dam
175-180 degrees w/ electric fan and shroud 22″ radiator
155-165 degrees w/ manual fan and shroud 26″ radiator
Replace 180 degrees stat


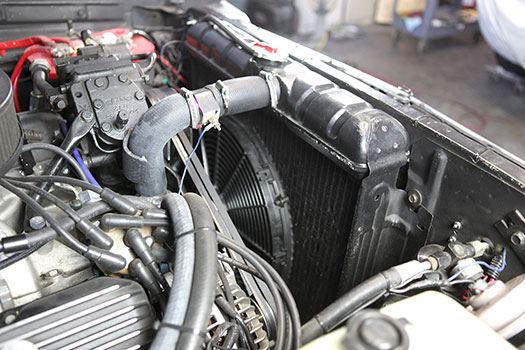
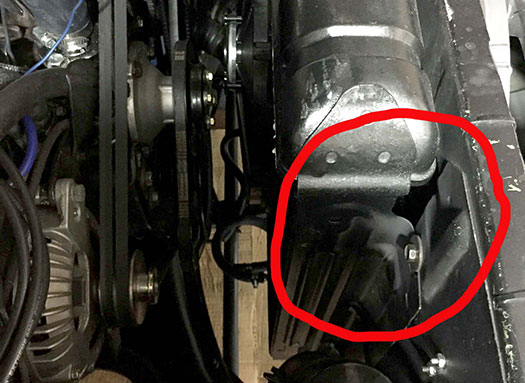


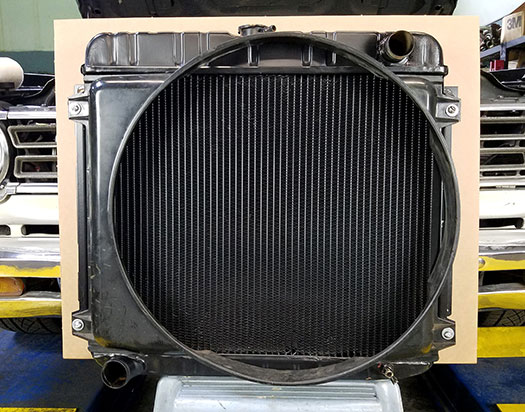



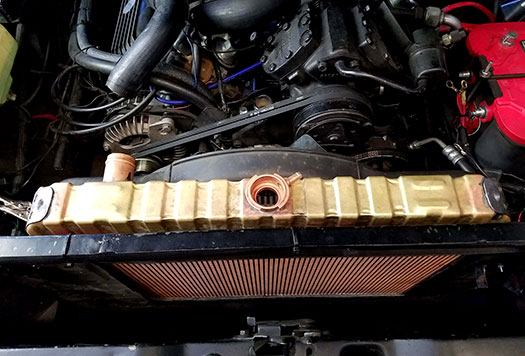


26″ radiators for 66-69 B-bodies with 22″ core supports can be found here.
